Getting started with FAKE - F# Make
INFO
This documentation is for FAKE.exe before version 5 (or the non-netcore version). The documentation for FAKE 5 can be found here
In this tutorial you will learn how to set up a complete build infrastructure with "FAKE - F# Make". This includes:
- how to install the latest FAKE version
- how to automatically compile your C# or F# projects
- how to automatically resolve nuget dependencies
- how to automatically run NUnit tests on your projects
- how to zip the output to a deployment folder
Install the F# compiler
"FAKE - F# Make" is completely written in F# and all build scripts will also be written in F#, but this doesn't imply that you have to learn programming in F#. In fact the "FAKE - F# Make" syntax is hopefully very easy to learn.
Download Calculator Sample
Now download the latest FAKE-Calculator.zip from the FAKE project site. This sample includes 3 tiny projects and has basically the following structure:
-
.paket
- paket.exe
-
src/app
- Calculator (command line)
- CalculatorLib (class library)
-
src/test
- Test.CalculatorLib
-
tools
- NUnit
- FxCop
- build.bat
- build.fsx
- completeBuild.bat
- completeBuild.fsx
- Calculator.sln
Getting "FAKE - F# Make" started
In the root of the project you will find a build.bat file:
1: 2: 3: 4: 5: 6: 7: 8: 9: 10: 11: |
|
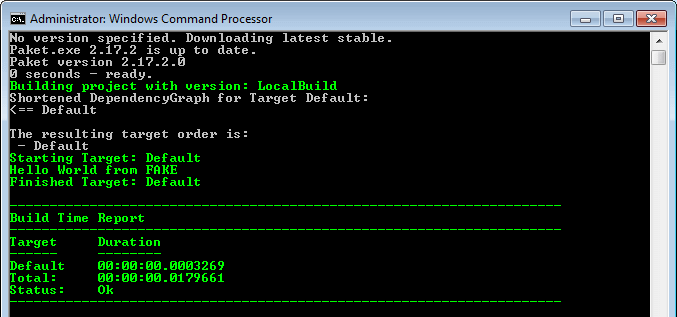
If you run this batch file from the command line then the latest FAKE version will be downloaded from nuget.org and your first FAKE script (build.fsx) will be executed. If everything works fine you will get the following output:
Specifying dependencies
Open the paket.dependencies file in your project's root and specify a dependency in it. Currently it looks like the following:
The file might look like this:
1: 2: 3: |
|
You can now run Paket from the command line:
1:
|
|
This will create the paket.lock file in your project's root. The file might look like this:
1: 2: 3: 4: |
|
The build script
Now open the build.fsx in Visual Studio or any text editor. It should look like this:
1: 2: 3: 4: 5: 6: 7: 8: 9: 10: 11: |
|
As you can see the code is really simple. The first line includes the FAKE library and is vital for all FAKE build scripts.
After this header the Default target is defined. A target definition contains two important parts. The first is the name of the target (here "Default") and the second is an action (here a simple trace of "Hello world").
The last line runs the "Default" target - which means it executes the defined action of the target.
Cleaning the last build output
A typical first step in most build scenarios is to clean the output of the last build. We can achieve this by modifying the build.fsx to the following:
1: 2: 3: 4: 5: 6: 7: 8: 9: 10: 11: 12: 13: 14: 15: 16: 17: 18: 19: 20: 21: 22: |
|
We introduced some new concepts in this snippet. At first we defined a global property called "buildDir" with the relative path of a temporary build folder.
In the Clean target we use the CleanDir task to clean up this build directory. This simply deletes all files in the folder or creates the directory if necessary.
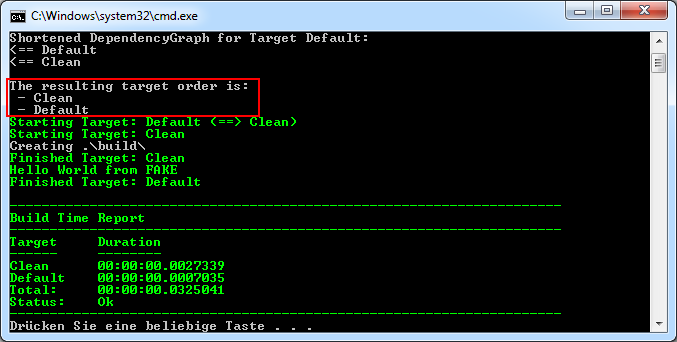
In the dependencies section we say that the Default target has a dependency on the Clean target. In other words Clean is a prerequisite of Default and will be run before the execution of Default:
Compiling the application
In the next step we want to compile our C# libraries, which means we want to compile all csproj-files under /src/app with MSBuild:
1: 2: 3: 4: 5: 6: 7: 8: 9: 10: 11: 12: 13: 14: 15: 16: 17: 18: 19: 20: 21: 22: 23: 24: 25: 26: 27: 28: 29: |
|
We defined a new build target named "BuildApp" which compiles all csproj-files with the MSBuild task and the build output will be copied to buildDir.
In order to find the right project files FAKE scans the folder src/app/ and all subfolders with the given pattern. Therefore a similar FileSet definition like in NAnt or MSBuild (see project page for details) is used.
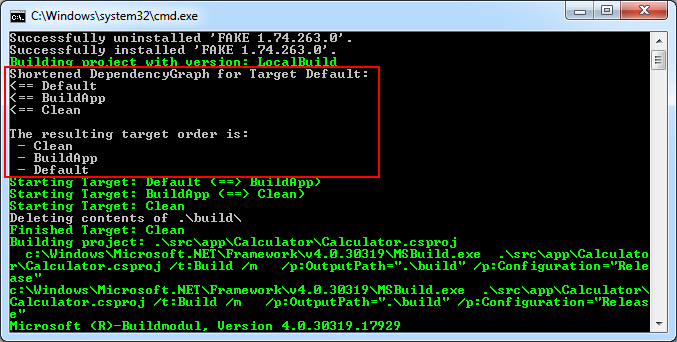
In addition the target dependencies are extended again. Now Default is dependent on BuildApp and BuildApp needs Clean as a prerequisite.
This means the execution order is: Clean ==> BuildApp ==> Default.
Compiling test projects
Now our main application will be built automatically and it's time to build the test project. We use the same concepts as before:
1: 2: 3: 4: 5: 6: 7: 8: 9: 10: 11: 12: 13: 14: 15: 16: 17: 18: 19: 20: 21: 22: 23: 24: 25: 26: 27: 28: 29: 30: 31: 32: 33: 34: 35: 36: 37: |
|
This time we defined a new target "BuildTest" which compiles all C# projects below src/test/ in Debug mode and we put the target into our build order.
If we run build.bat again we get an error like this:
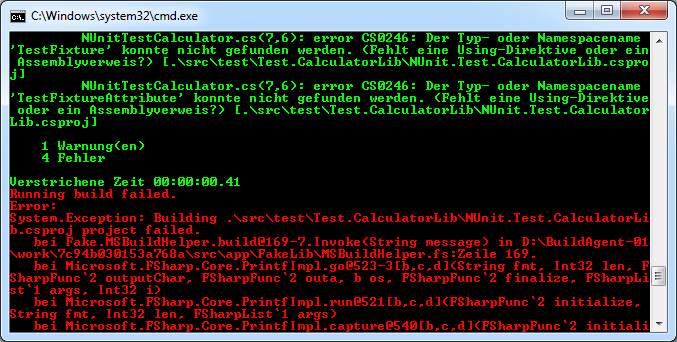
The problem is that we didn't download the NUnit package from nuget. So let's fix this in the build script:
1: 2: 3: 4: 5: 6: |
|
With this simple command FAKE will use nuget.exe to install all the package dependencies.
You may experience this tutorial not quite working with the newest package versions. In this case you can edit the paket.dependencies file to something like this:
1: 2: 3: 4: 5: 6: 7: |
|
Again run Paket from the command line:
1:
|
|
This will fetch nuget.exe from nuget.org and also download an early version of NUnit that contains the NUnit runner. The edit to paket.dependencies does not replace the RestorePackages() step. The NUnit.Test.CalculatorLib test project references the NUnit version 2.6.2 library, so we need that version too.
Running the tests with NUnit
Now all our projects will be compiled and we can use FAKE's NUnit task in order to let NUnit test our assembly:
1: 2: 3: 4: 5: 6: 7: 8: 9: 10: 11: 12: 13: 14: 15: 16: 17: 18: 19: 20: 21: 22: 23: 24: 25: 26: 27: 28: 29: 30: 31: 32: 33: 34: 35: 36: 37: 38: 39: 40: 41: 42: 43: 44: 45: 46: 47: 48: |
|
Our new Test target scans the test directory for test assemblies and runs them with the NUnit runner. FAKE automatically tries to locate the runner in one of your subfolders. See the NUnit task documentation if you need to specify the tool path explicitly.
The mysterious part (fun p -> ...) simply overrides the default parameters of the NUnit task and allows to specify concrete parameters.
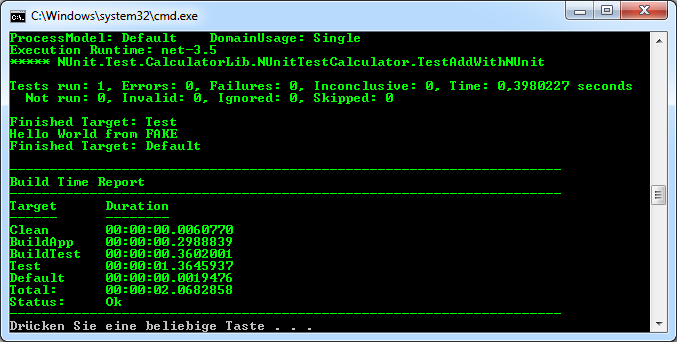
Alternatively you could also run the tests in parallel using the NUnitParallel task:
1: 2: 3: 4: 5: 6: 7: |
|
Deploying a zip file
Now we want to deploy a *.zip file containing our application:
1: 2: 3: 4: 5: 6: 7: 8: 9: 10: 11: 12: 13: 14: 15: 16: 17: 18: 19: 20: 21: 22: 23: 24: 25: 26: 27: 28: 29: 30: 31: 32: 33: 34: 35: 36: 37: 38: 39: 40: 41: 42: 43: 44: 45: 46: 47: 48: 49: 50: 51: 52: 53: 54: 55: 56: 57: 58: 59: |
|
The new Deploy target scans the build directory for all files. The result will be zipped to /deploy/Calculator.zip via the Zip task.
What's next?
If you want you could now add a FxCop target to your build in order to check specific naming rules or framework guidelines.